Jamar Traxpro
This tutorial provides a step-by-step guide on how to migrate data from your .TF2 and .DMP files into GEOCOUNTS.
To start, get the latest copy of TraxPro: v.2.9.301+
TF2 Per Vehicle Counts
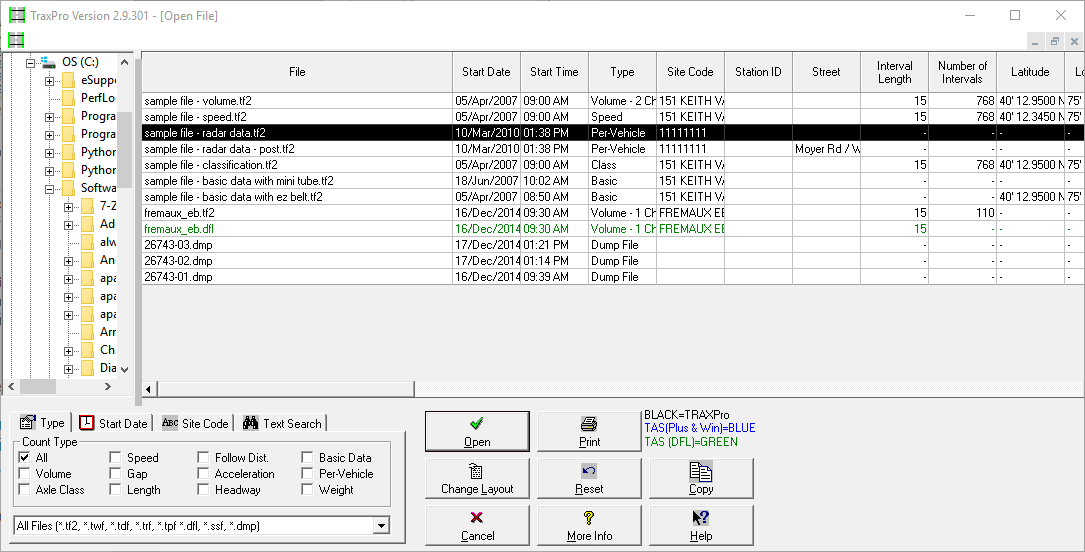
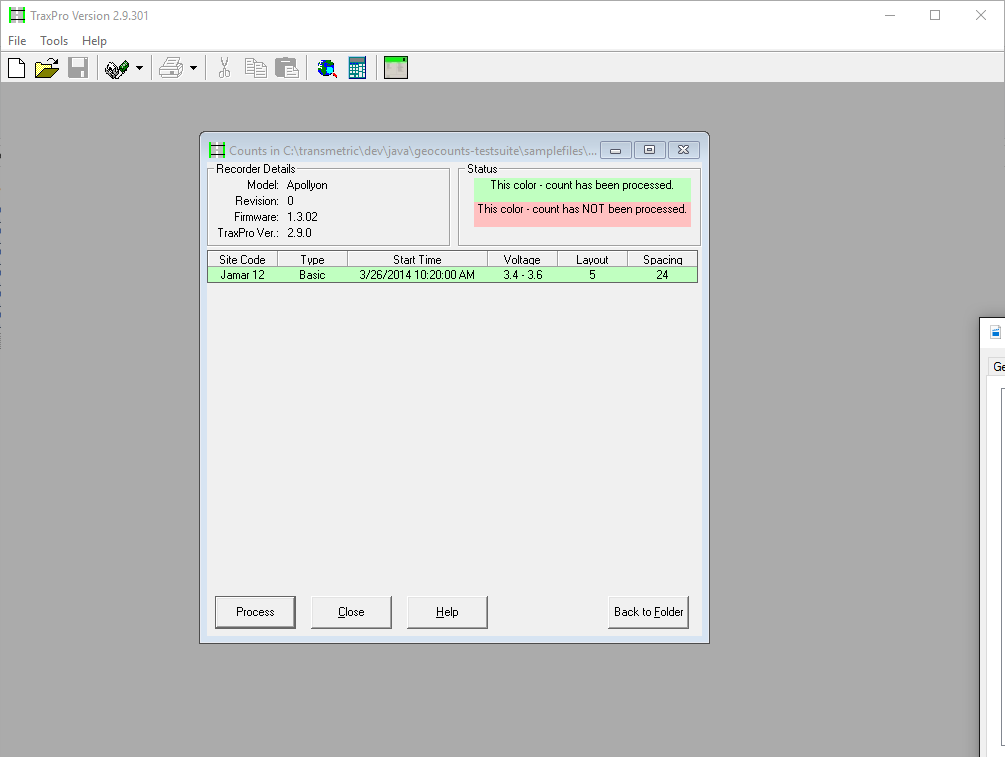
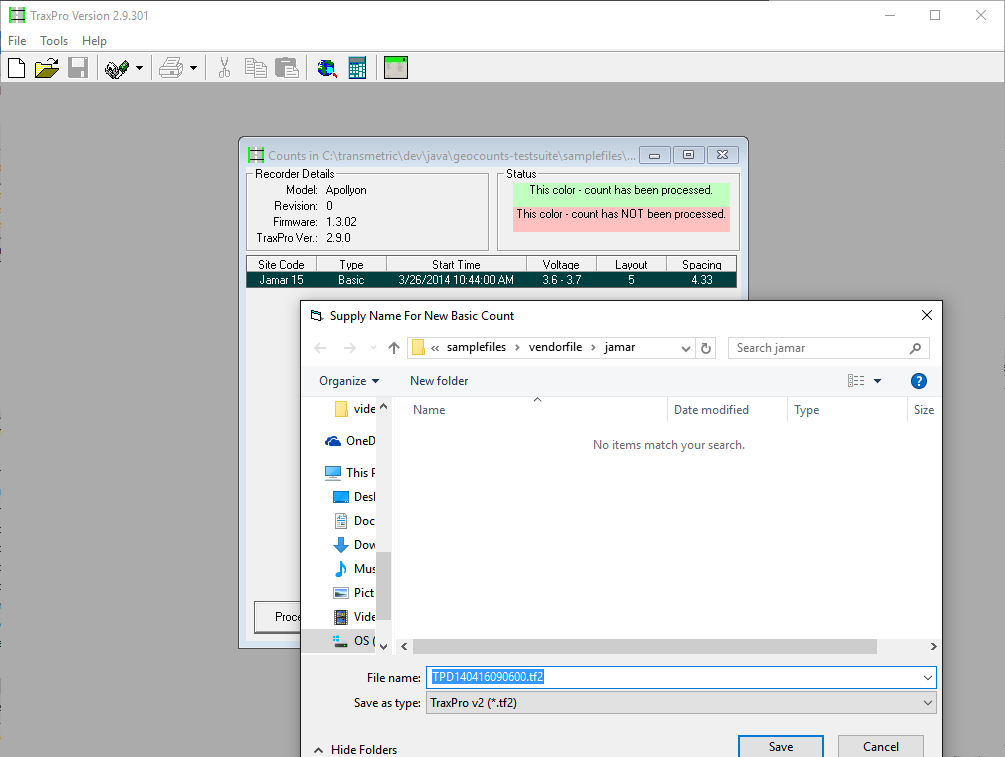
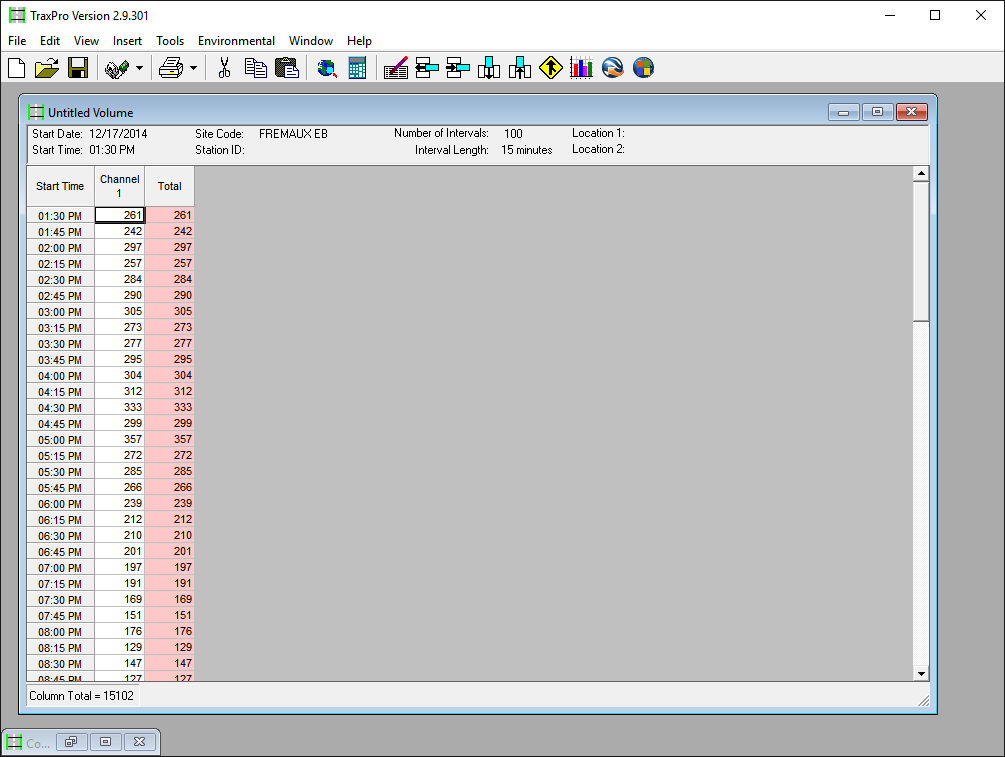
Step 1: Load your Per-Vehicle TF2 file into TraxPro
- File > Open
- Double-click file to open
Step 3: Fill in the required fields:
- StationID
- Channel Definition including Channel, Heading, Lane and Usage
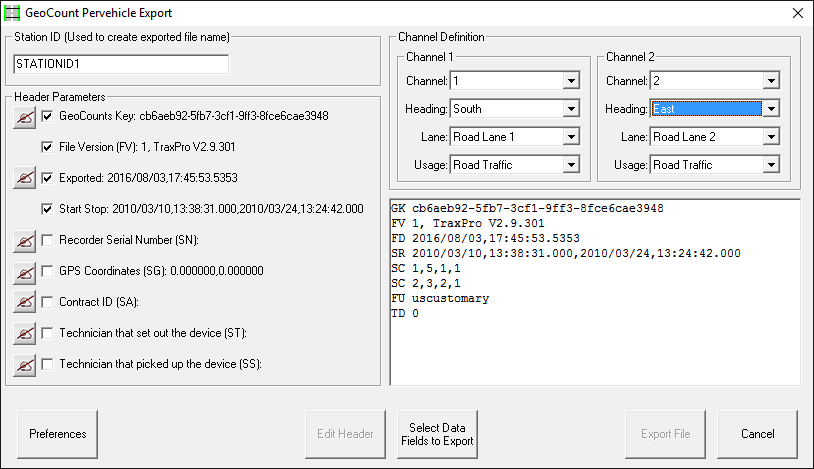
Step 4: Click on Select Data Fields to Export then select the applicable fields. In this example, "Speed" and "Length"
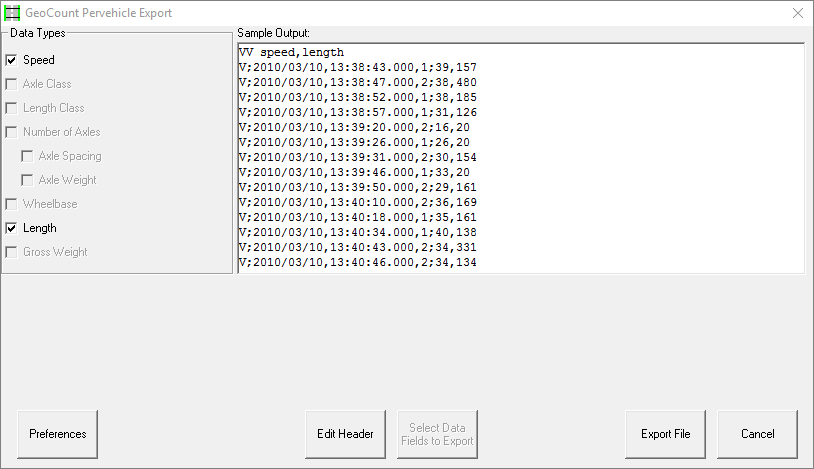
Step 5: Click on Export File to complete export
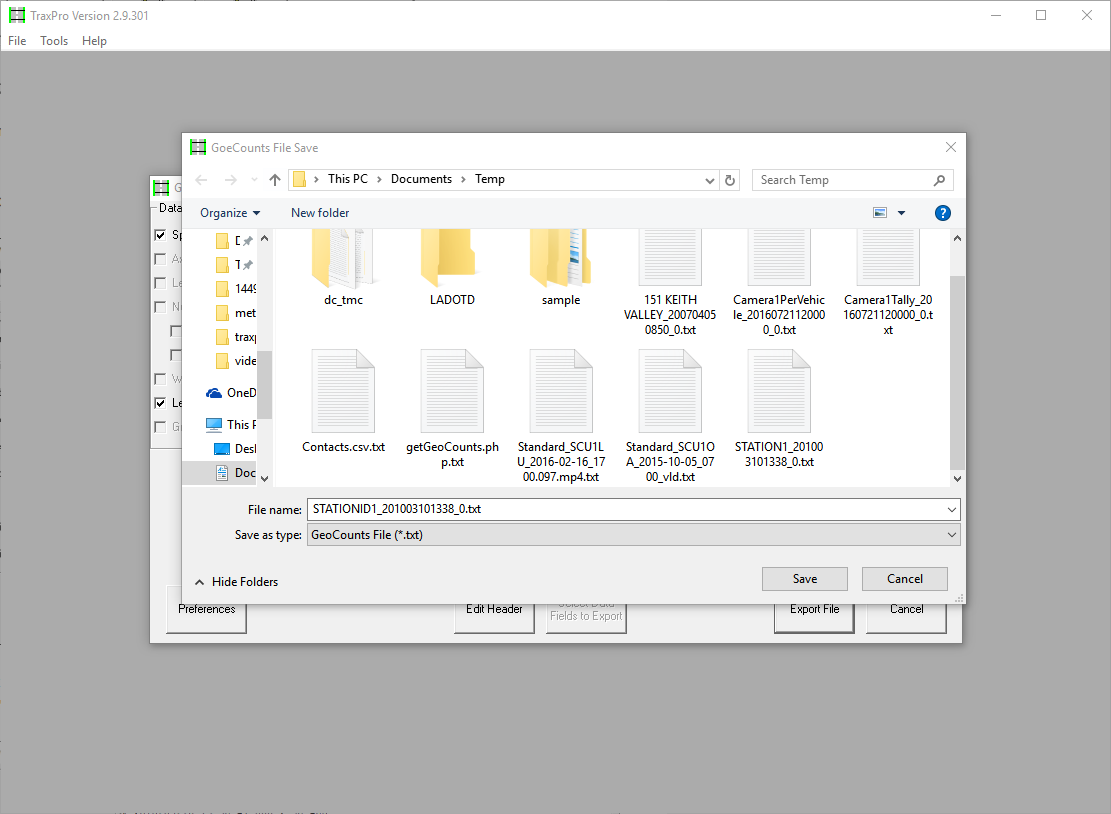
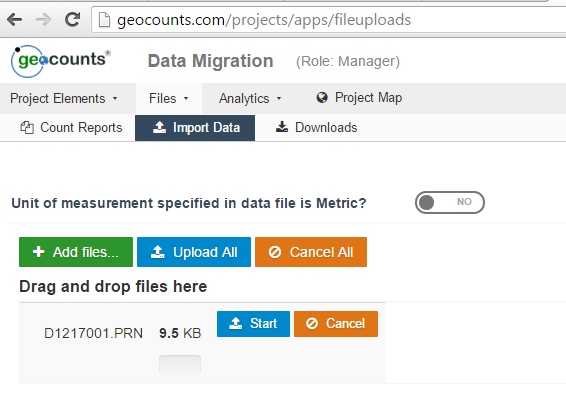
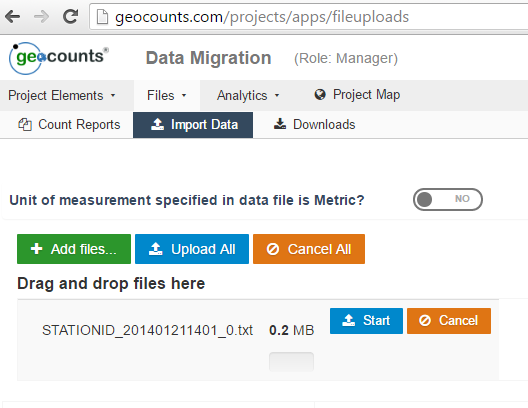
Step 5: Upload file into your GEOCOUNTS Project via Files > Import Data
DMP Per Vehicle Files
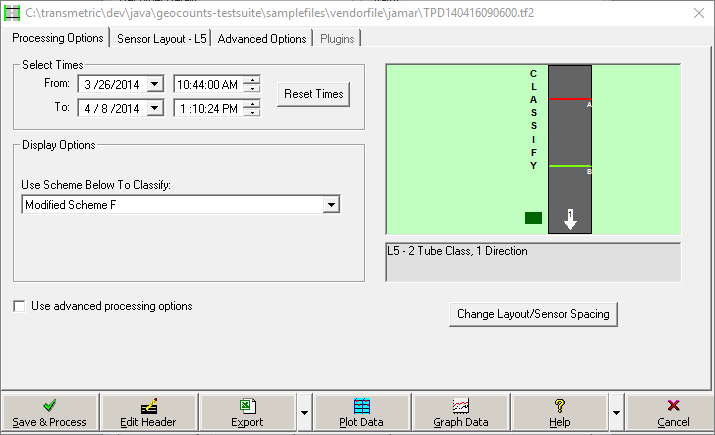
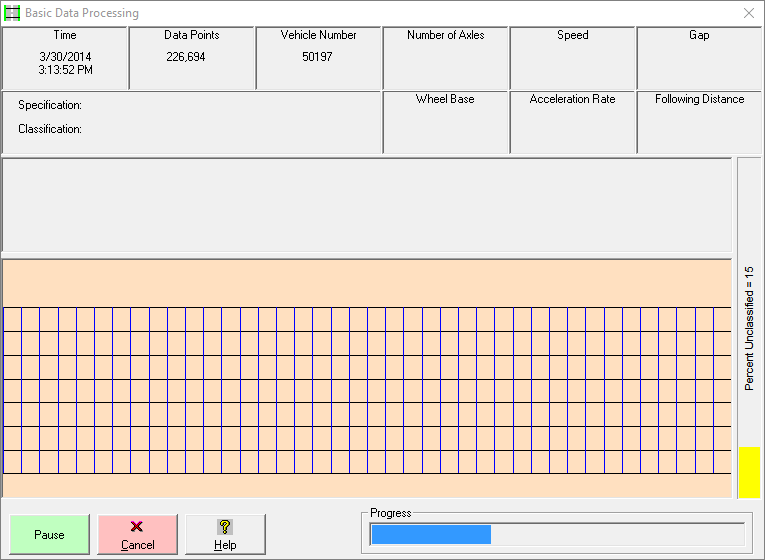
Step 1: Load your *.dmp file into TraxPro, click on process and save as TF2 file.
Step 2: Click on Save and Process
Step 3: Click on "GeoCounts" and follow steps outlined in TF2 Per Vehicle Counts - Step 2 above.
DMP Tally (Volume,Speed,Class) Counts
Step 1: Load your *.dmp file into TraxPro, click on Process
Step 2: Export file to PRN
- Click on File > Export > Peek/Streeter PRN and fill in desired fields. (Note location of "Output Folder")
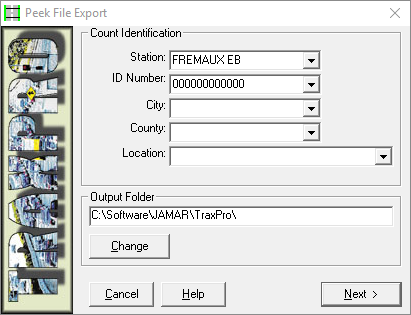
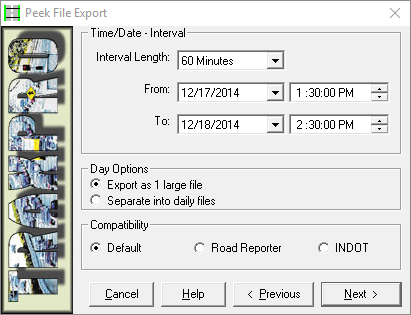
- Select Compatiblity > Default as shown below
- Click on "Next >"
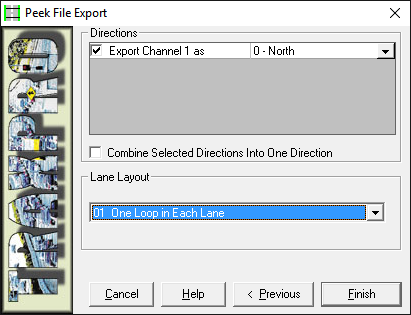
Step 3: IMPORTANT: In your Lane Layout dropdown, select "One Loop in Each Lane"
Step 4: Upload file into your GEOCOUNTS Project via Files > Import Data
IMPORTANT: If files are automatically decoded, they will be made available at Files > Count Reports